IMPORTANT: ‘Client Administration’ rights are required for settings.
Step 1
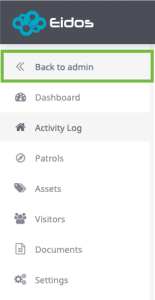
Fig 1.1
Multiple Site Administration: To create or edit a user you will need to be in ‘Admin’.
If you are in the ‘Activity Log’ you will need to go ‘<< Back to admin’ (see fig 1.1).
Single Site Administration: Skip this step and go to Step 2.
Step 2
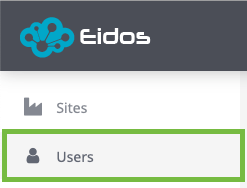
Fig 1.2
Multiple Site Administration: Once in ‘Admin’ select ‘Users’ if not already in it (see fig 1.2).
Single Site Administration: Select ‘Users’ at the bottom of the left hand menu.
Step 3
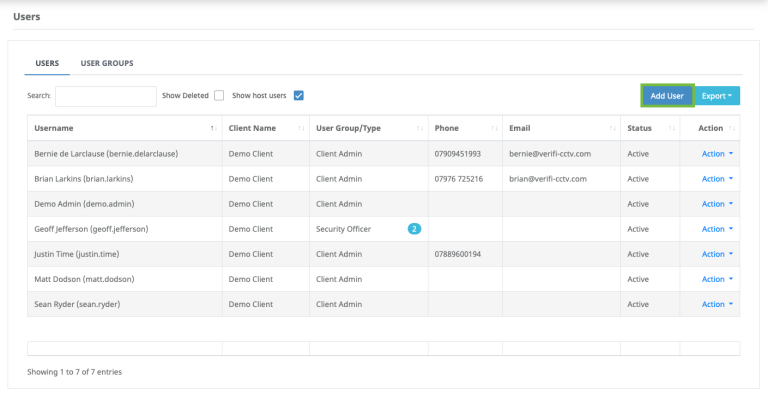
Fig 1.3
To create a user, click on ‘Add User’ (see fig1.3)
Step 4
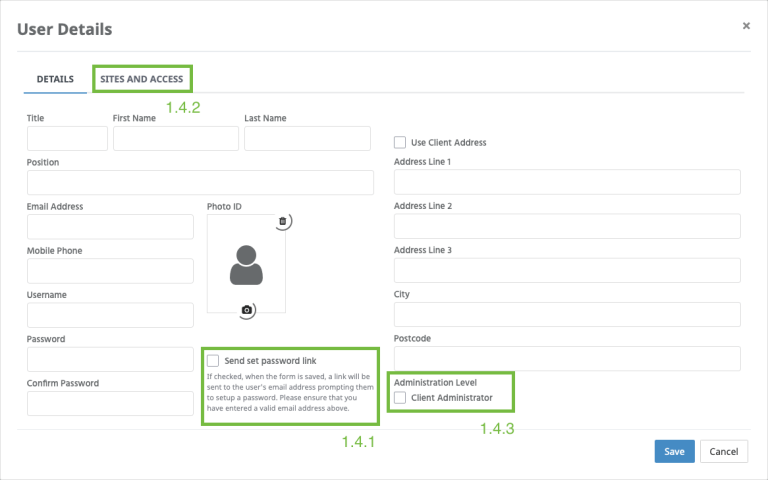
Fig 1.4
Complete user details (see fig 1.4).
Passwords: Passwords can either be created when setting up the user account or alternatively you can tick ‘Send set password link’ (see 1.4.1). This will send a link via email to the user prompting them to create their own password. Note that the link will only stay live for 30 minutes.
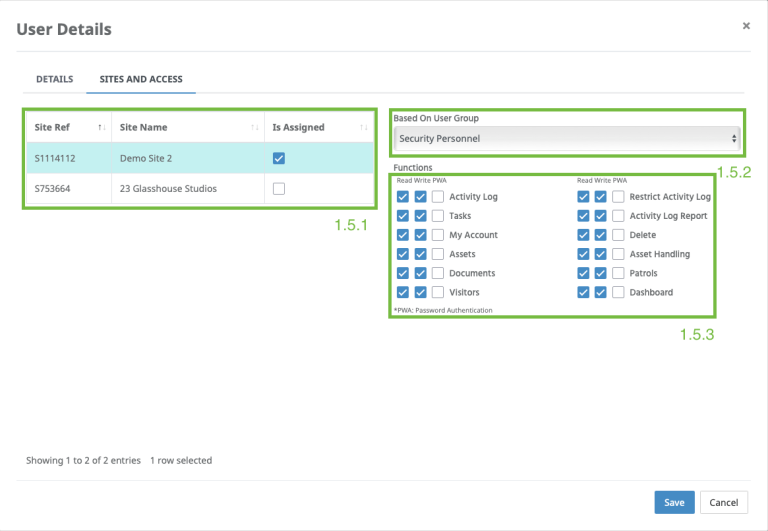
Before saving ensure you set access levels by clicking on the ‘Sites & Access’ tab (see 1.4.2 & fig 1.5).
Administration Level: To give the user administration rights so they can create and edit users and have access to the settings tick ‘Client Administrator’ (see fig 1.4.3).
Step 5
Fig 1.5
Site Access: In the case where you manage more than one site you will have the option to assign single or multiple sites to a user (see 1.5.1).
User Groups: Preconfigured access levels can be selected from the dropdown menu (see 1.5.2 & fig 1.6). Alternatively, you can manually select ‘Functions’ access levels (see 1.5.3)
Function Options:
Read – View data only.
Write – Add data.
PWA (Password Authentication) – In situations where you have more than one operator using a PC at the same time, enabling PWA will ensure that any data entered is assigned to the correct individual. After every entry or change is made the operator will be asked to confirm who they are by entering their password.
Step 6
Fig 1.6
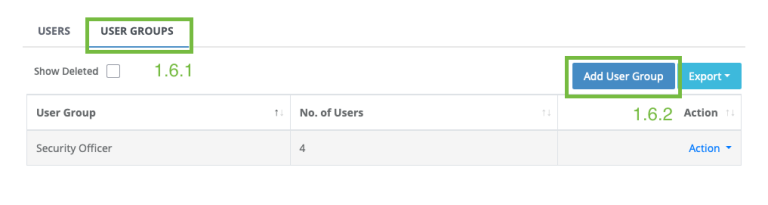
User Groups: To create a user group, click on the ‘User Groups’ tab (see 1.6.1) and then click ‘Add User Group’ (see 1.6.2).
Step 7
Fig 1.7
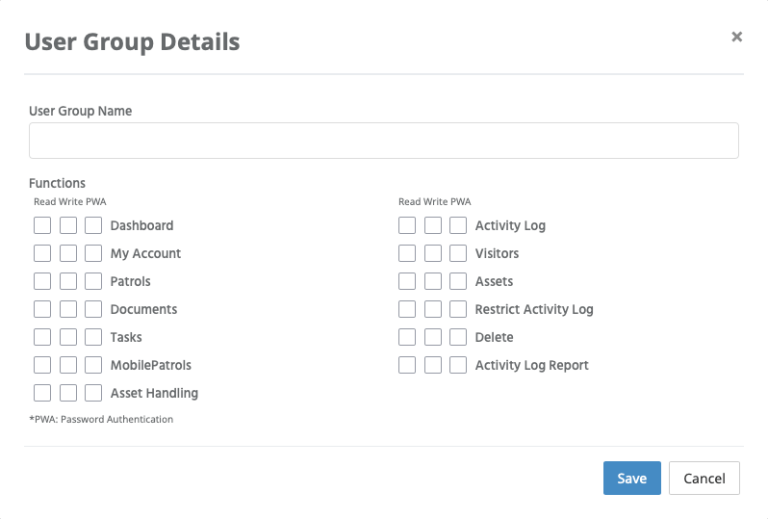
Give the user group a name and select the functions you wish to give the group (see fig 1.7).